
Cyberpunk panels DIY
This tutorial covers my approach to creating the cyberpunk panels used both for a harness as well as a mask I created.
Materials
2 mm aluminum sheet
vinyl
black and grey spray color
black and brown acrylic color
bitumen paint and thinner
paper
Tools
sheet metal scissors or sheet metal bench cutter
Hammer and stone
Pliers
Stencilcutter (I used a silhouette portrait 2)
metal scribe
scissors
bench vice
Files, sandpaper and scotchbrite


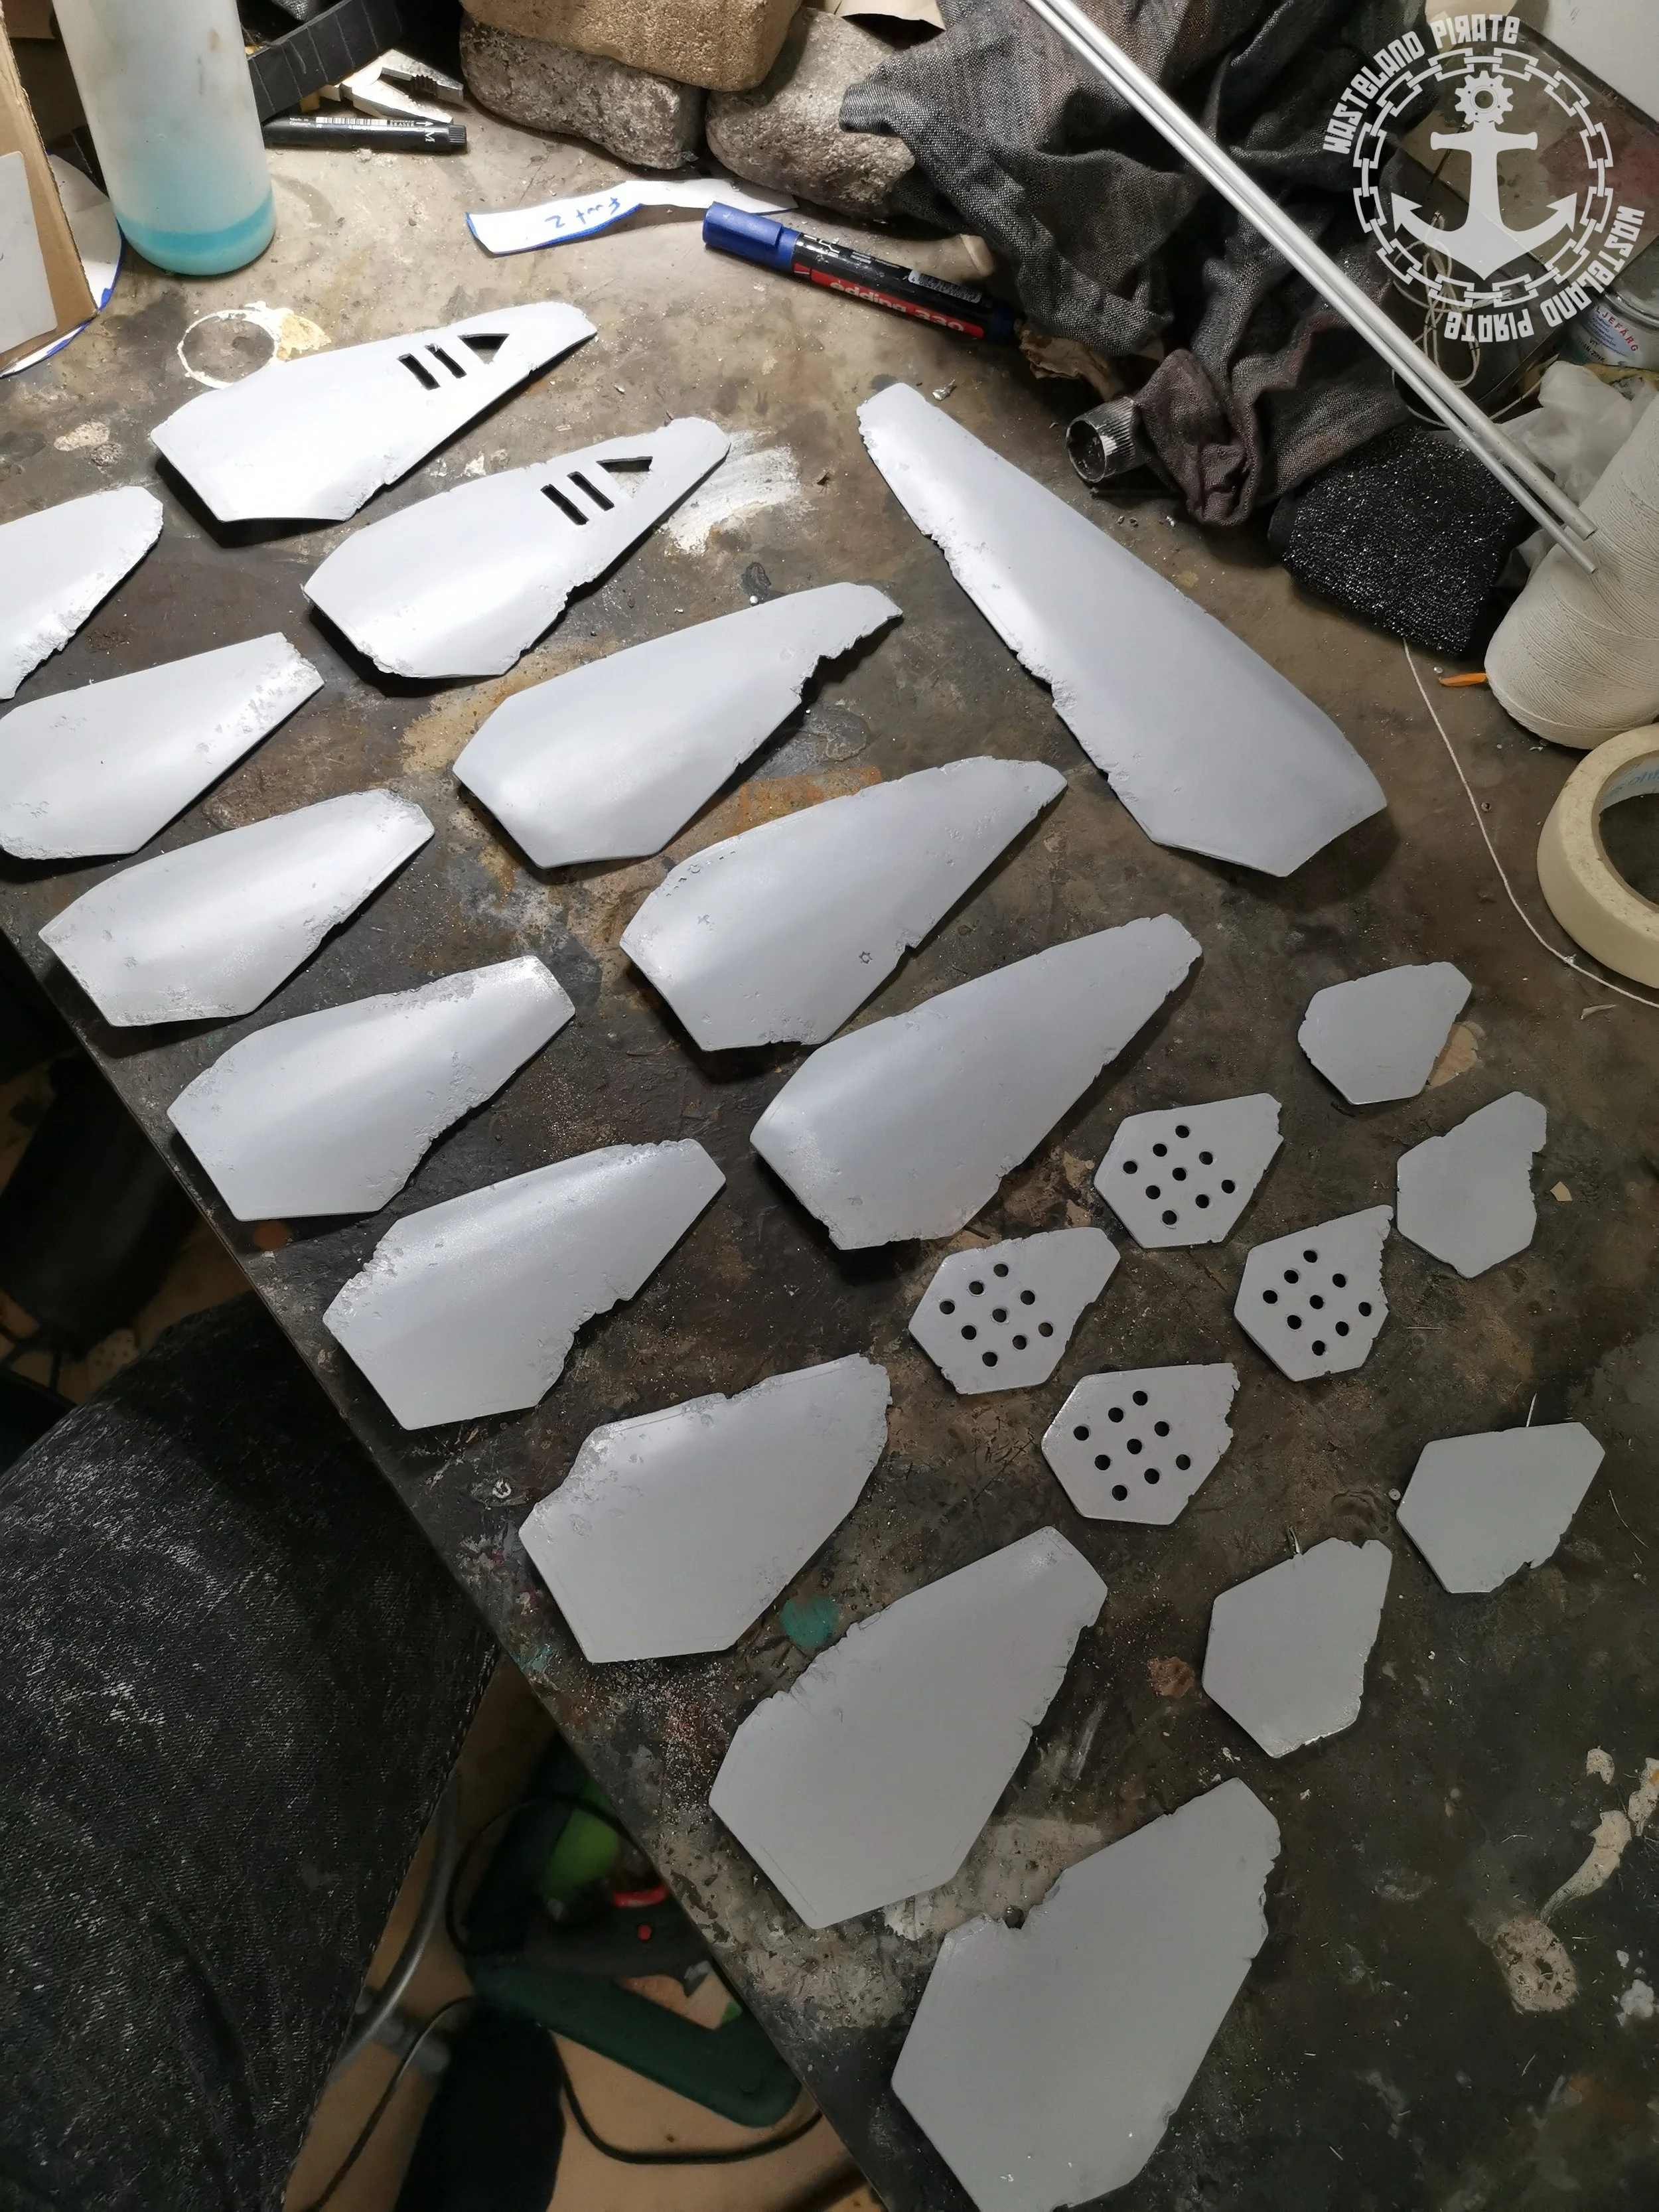
Started out with making a template from paper by folding it in half and create the shape I wanted and then cut it out with the scissors. The folding of the paper ensures a symmetrical shape. After this was cut on the sheet metal bench cutter I added a optional step by adding a scribed line around the edge of the panel


Next up would be to add damage to the panel. I started out with cutting pieces of with sheet metal sheers and to rip pieces with the pliers. Make sure to make this damage look natural instead of just straight cuts.
After the damage is added I put the panel face down on the stone and hit it with a hammer to impart the texture of the stone into the aluminum. I focus my hammer strikes on the areas around the damage to enhance the organic texture there.
The panel is flat and to shape it I use a vice and place the panel in the betwen the jaws and bend it very lightly then move the panel a bit and repeat until I got a nice curve on the panel without too many bends (these can be sanded in the next step but better to avoid getting them by applying less force)
Last step is to sand the whole panel to take away any sharp points or bends in the piece. I really like to use sand paper / scotchbrite for the flat area and files for the edges.


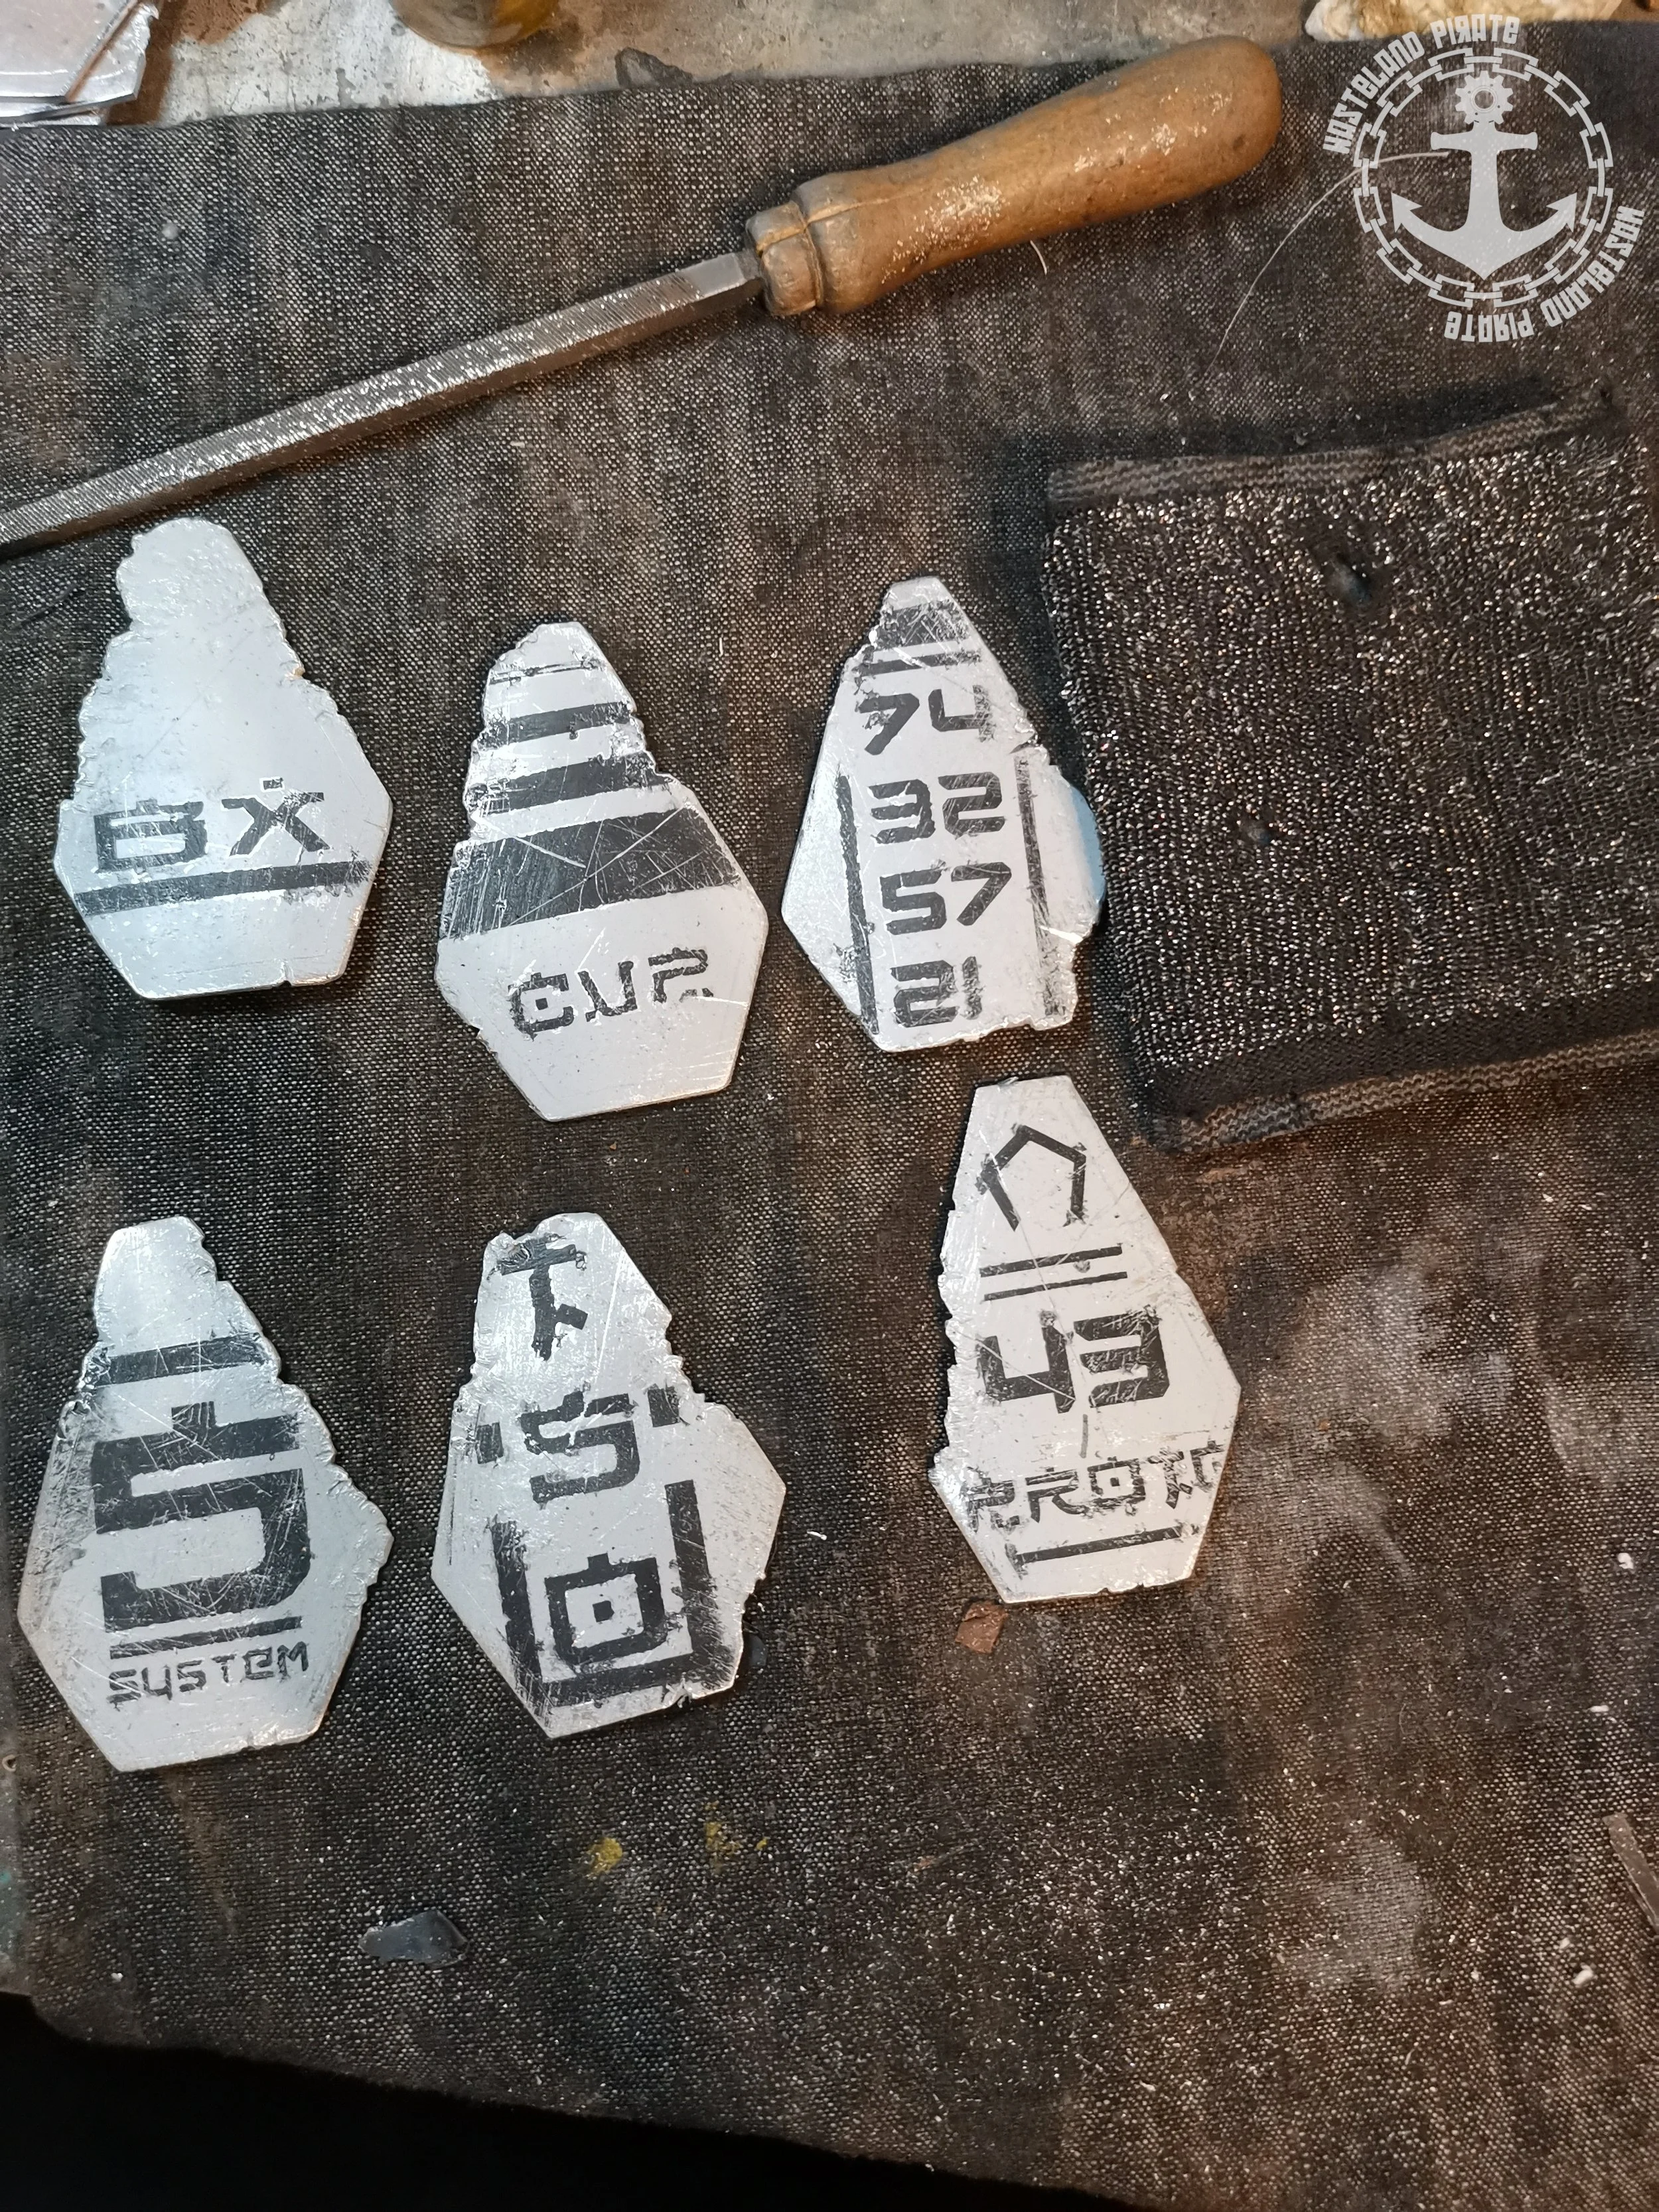
To pain these I started with a grey primer and sprayed everything, letting it dry fully and then added the stencils. The stencils sadly I have no good picture of but they were made with the software that came with the cutter. When I had applied all stencils I sprayed it down with a black rattle can. Once dried I removed the stencils. As you can see on the right picture there were quite some bleed of paint so the lines are not super sharp. This will not be a issue with the look we are going for but these could for sure have been neater.
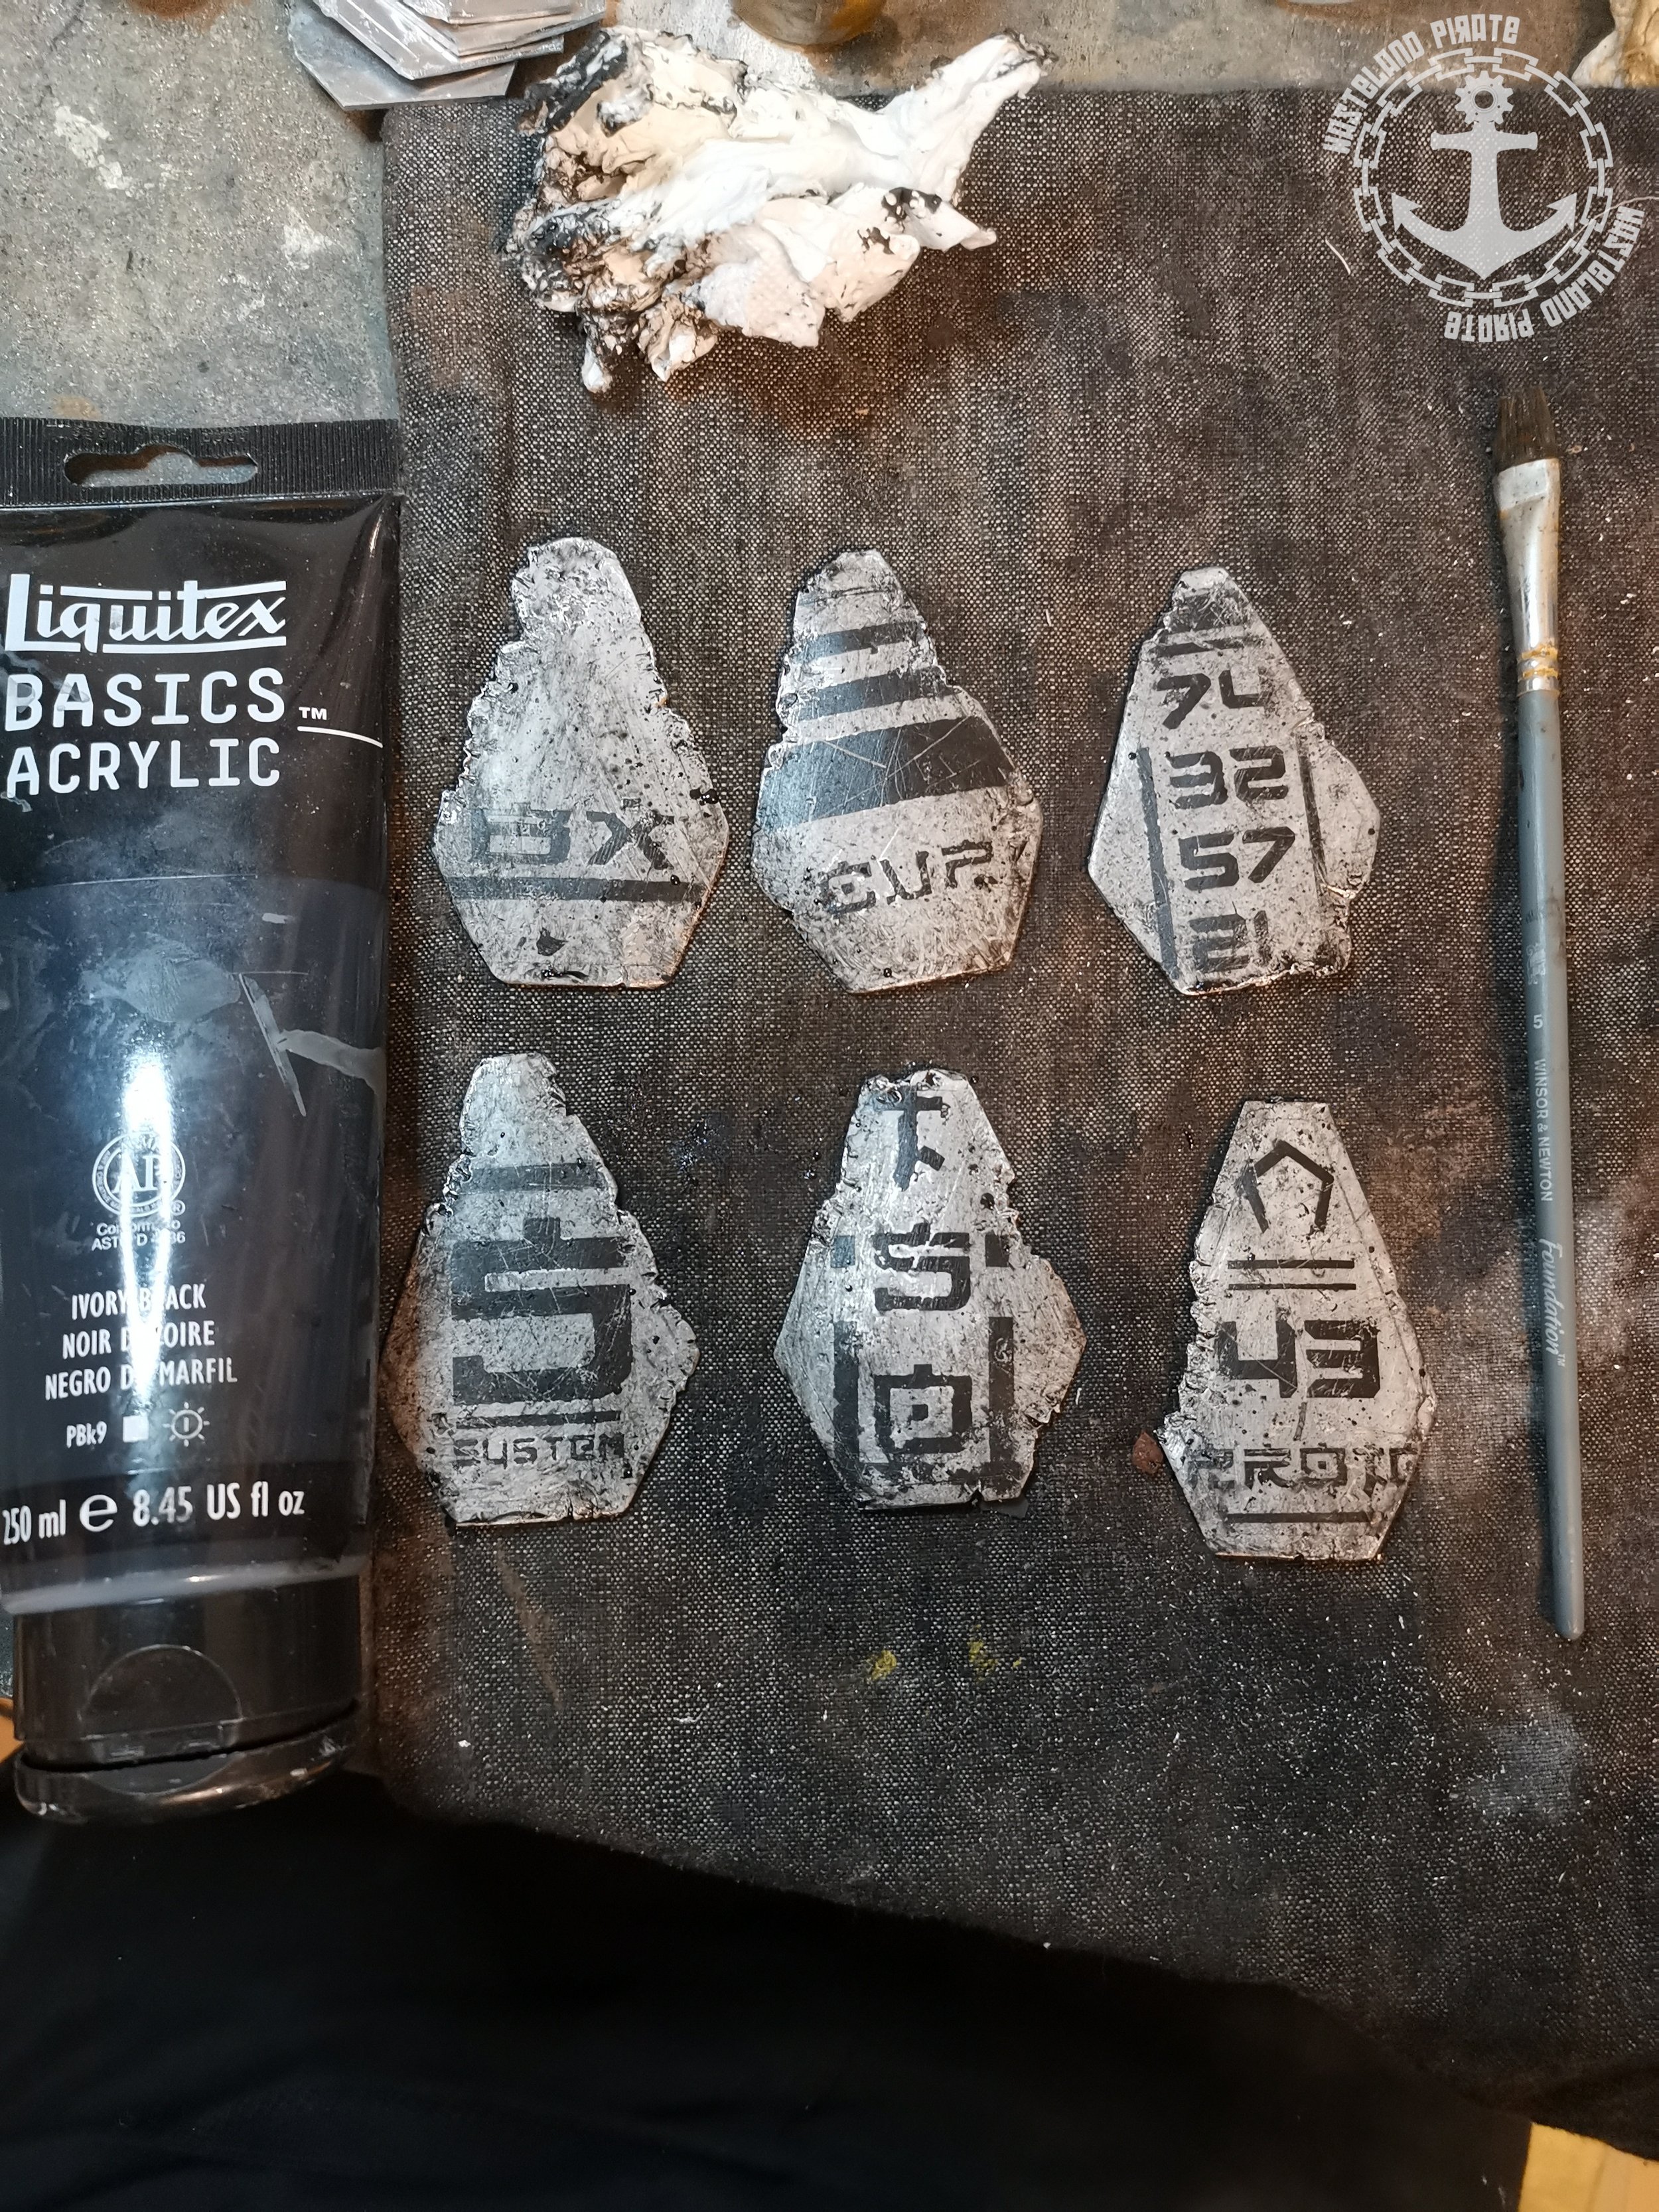

To add a good distressing and weathring we need to go about doing it in layers. First up is to add distressing with a scotch brite pad to add some scratchs to the stenciled black areas and to bring up some aluminum on the textured areas and so breaking up the grey primer. I also used a file to add a bir more distressing to the paint in random patterns such as lines or to remove more paint on very textured areas.
When the first distressing is done it is time for the first shading. Using black acrylic paint I wash the panels with a mix of water and paint. Use a fabric towel to remove the excess. Play around with different ratios of water to paint and how you wipe of the paint to acheive different resutls. Try and avoid using paper towels as they soak up more moisture than fabric. As a last detail I like to flicker on some paint to create small splatter patters . This can be done with a stiff brush (toothbrush works great for small splatter)
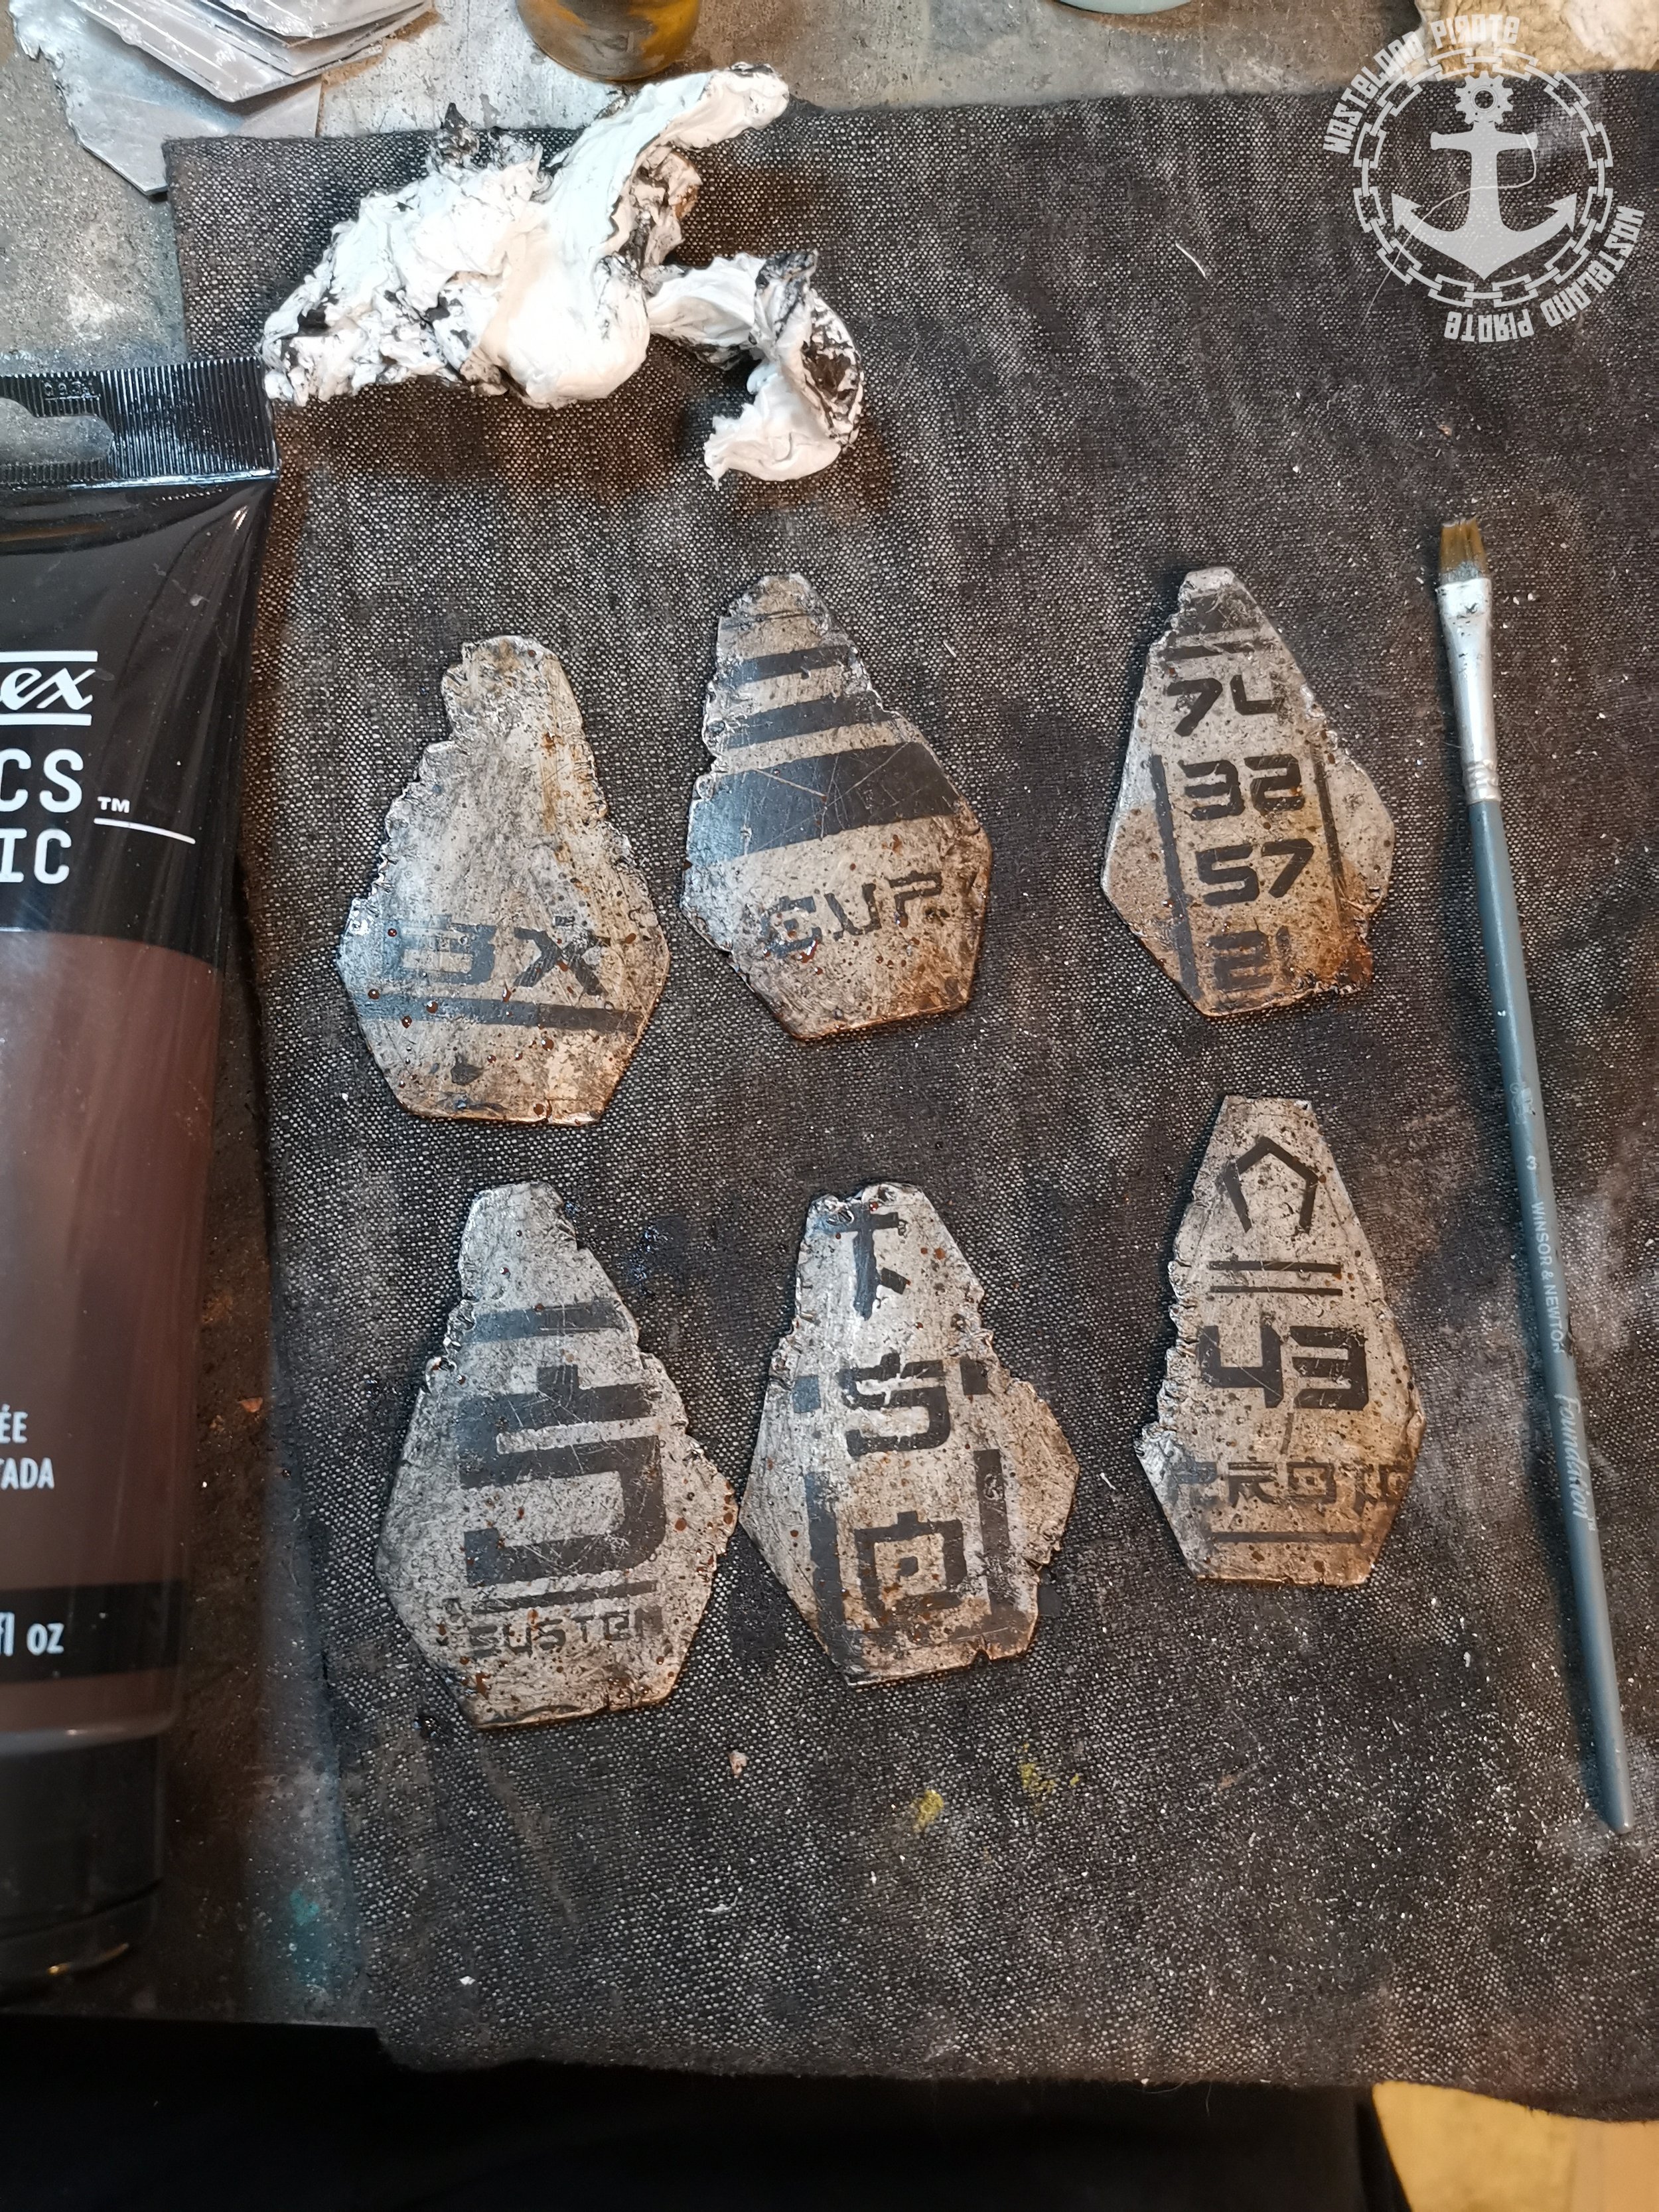
Before moving forward to the next shading I let the paint dry fully. Then I apply the same style of wash/shade but with a brown paint this time. Same techniques are applied.
When fully dried I add more distressing with the scotch brite again to tone down the shading and make it look less ‘painted on’ and instead worn and torn.


Now for the final details. I applied a rust wash using iron powder and rust activatior with a stiff brush in a pattern moving from the base towards the tip.
When this had dried for 24h I removed the excess rust with a towel.
Just repeat all the steps until all the panels are done.

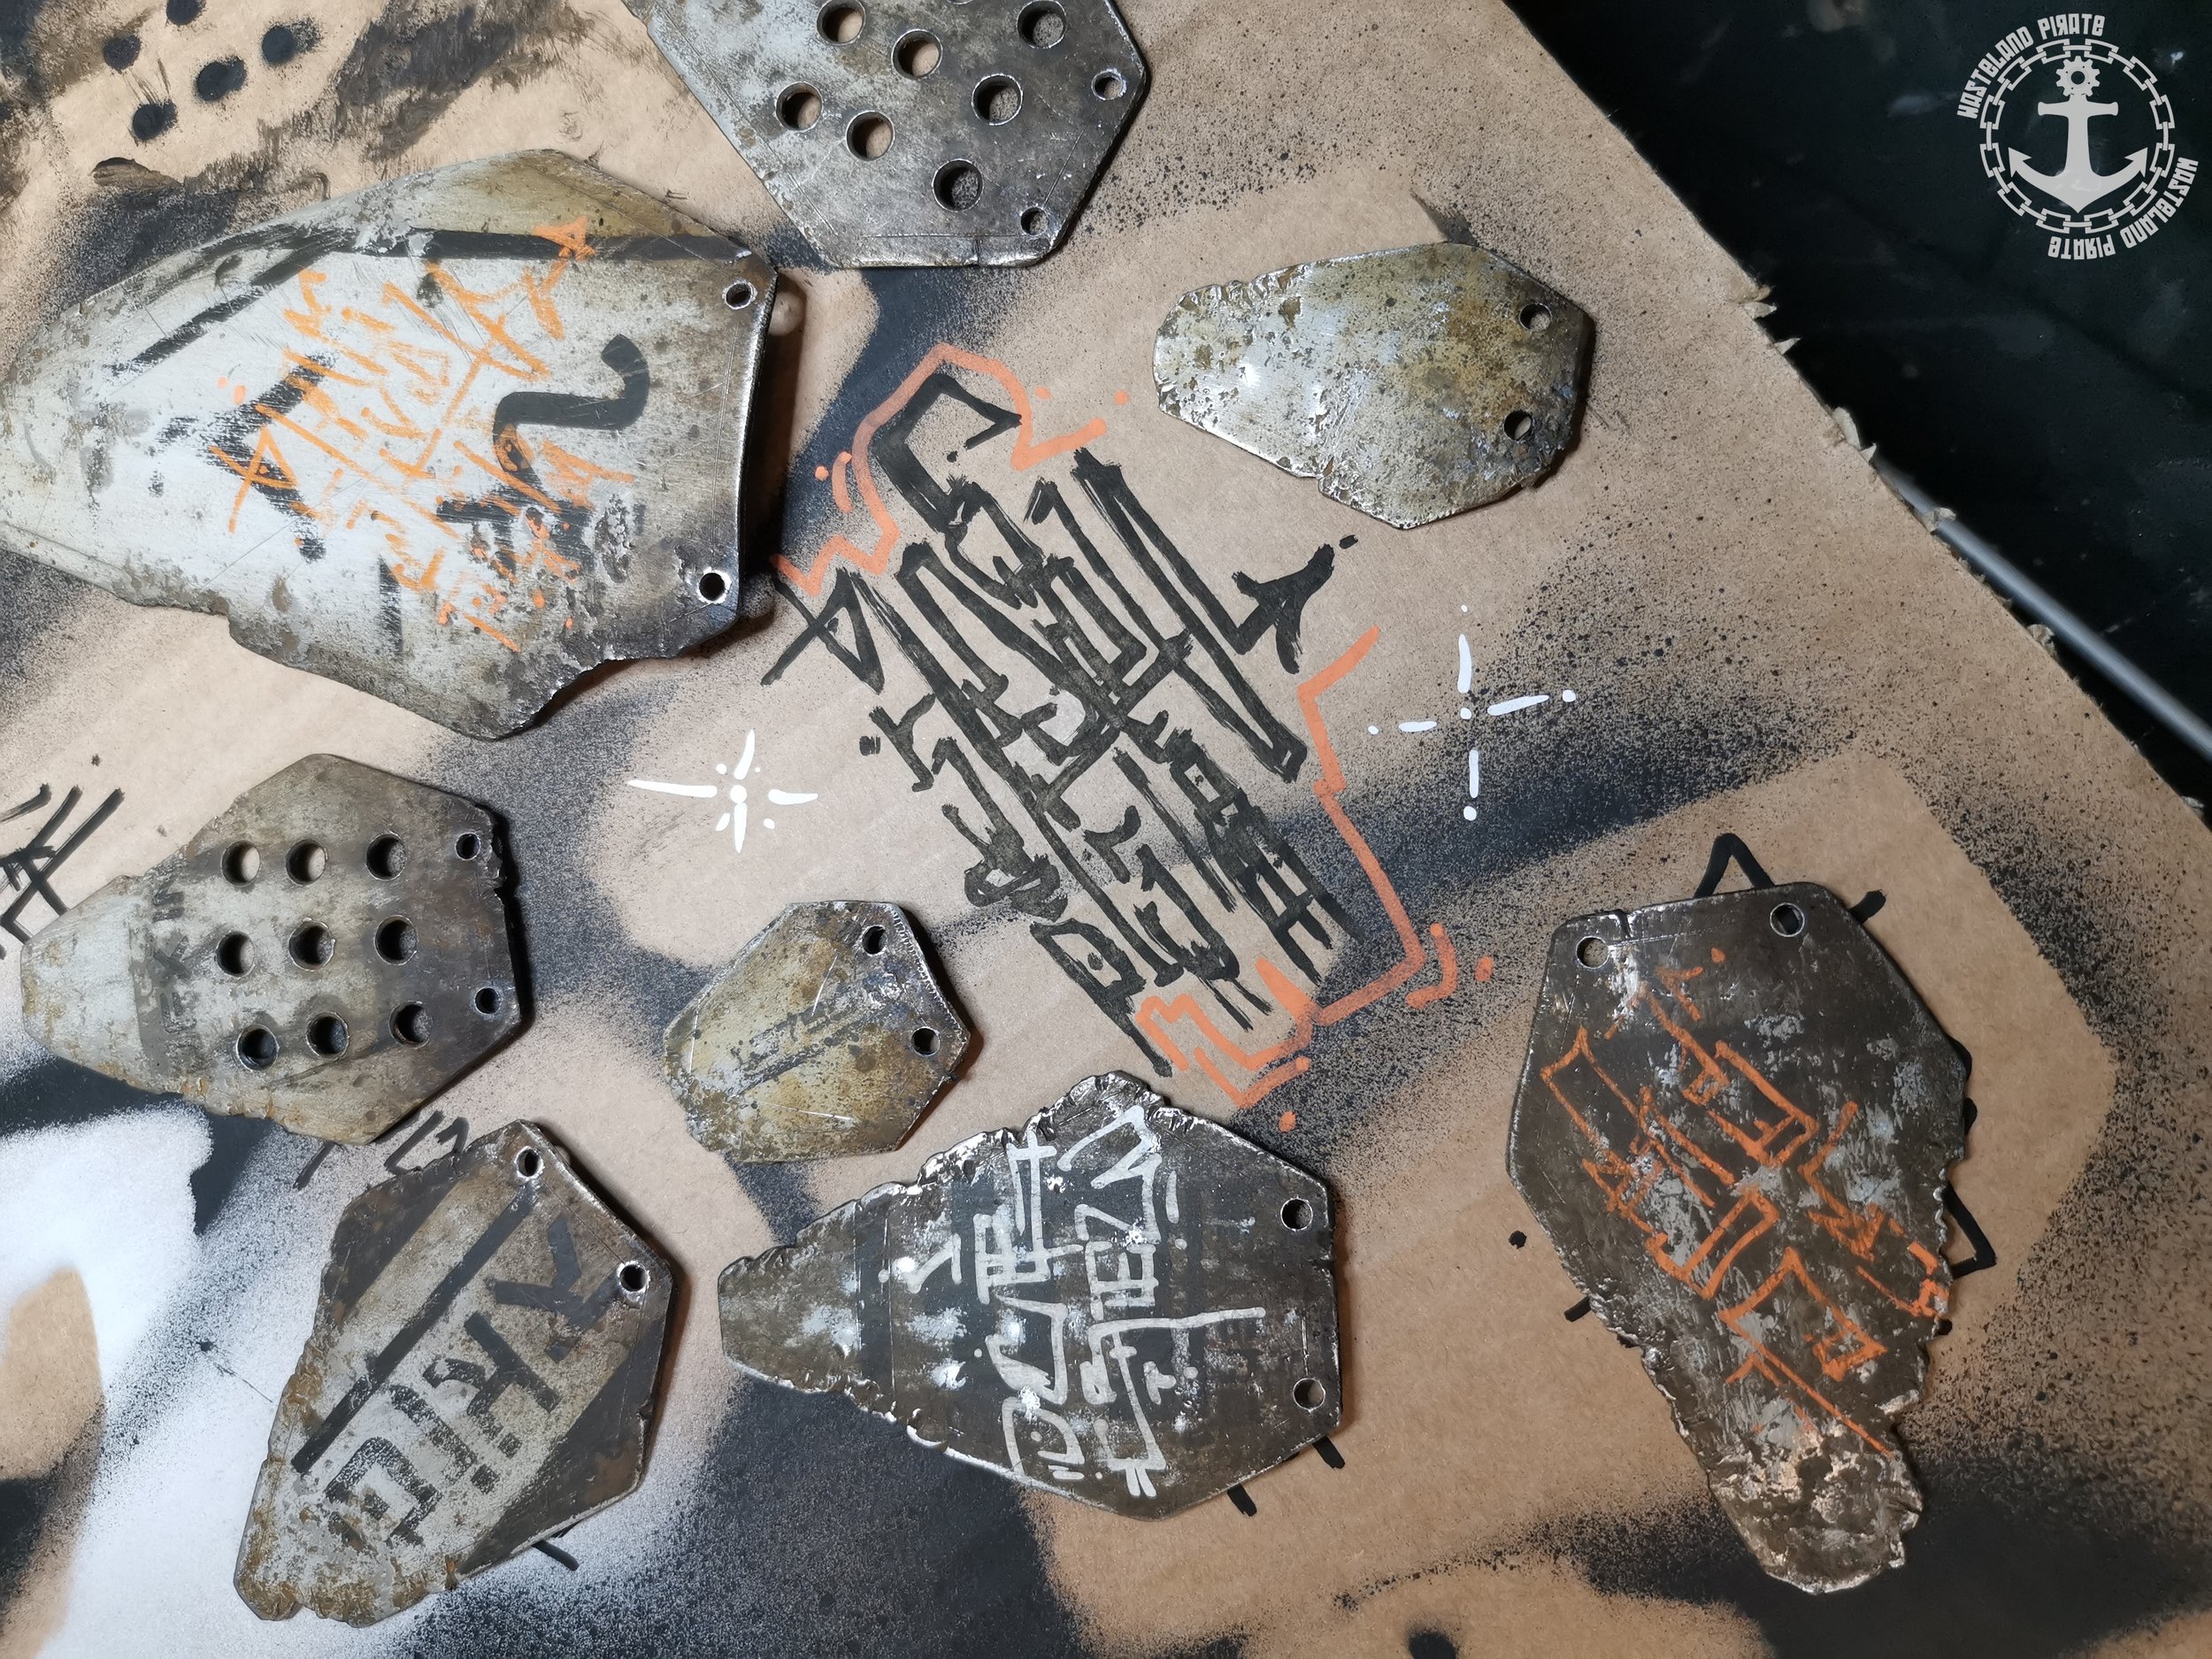
To create some extra details to some pieces I added a optional step of adding some tags with molotov acrylic pens to get that proper street cyber punk look. Just practice on paper first than add to the panel
When fully dried go at it with the scotch brite to add some distressing, maybe some light washes of acrylics to add some depth /age to the pieces.
Then apply the panels to your project and enjoy.

